

Design and send emails in minutes: VerticalResponse’s new editor makes it easy
Our new email editor gives you more freedom to change the layout and individual design elements of your campaigns. To introduce all of the updates and help you start sending emails today, we’ve created a series of how-to guides. In this edition, we show you how to design and send emails with the app’s step-by-step campaign building process and content blocks.
Step-by-step process
Designing and sending emails is a simple and straightforward process with the new editor’s step-by-step flow. The time-saving, easy-to-follow steps guide you through the process of creating your own email campaign — helping you efficiently write a subject line, select a template, create a campaign, edit the email’s appearance, add your subscriber list, and schedule your campaign.
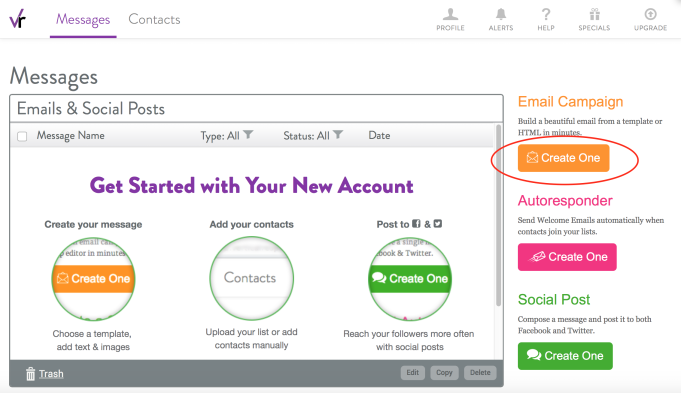
When you’re ready to build a new email, click the Create One button under Email Campaigns on the Messages page.
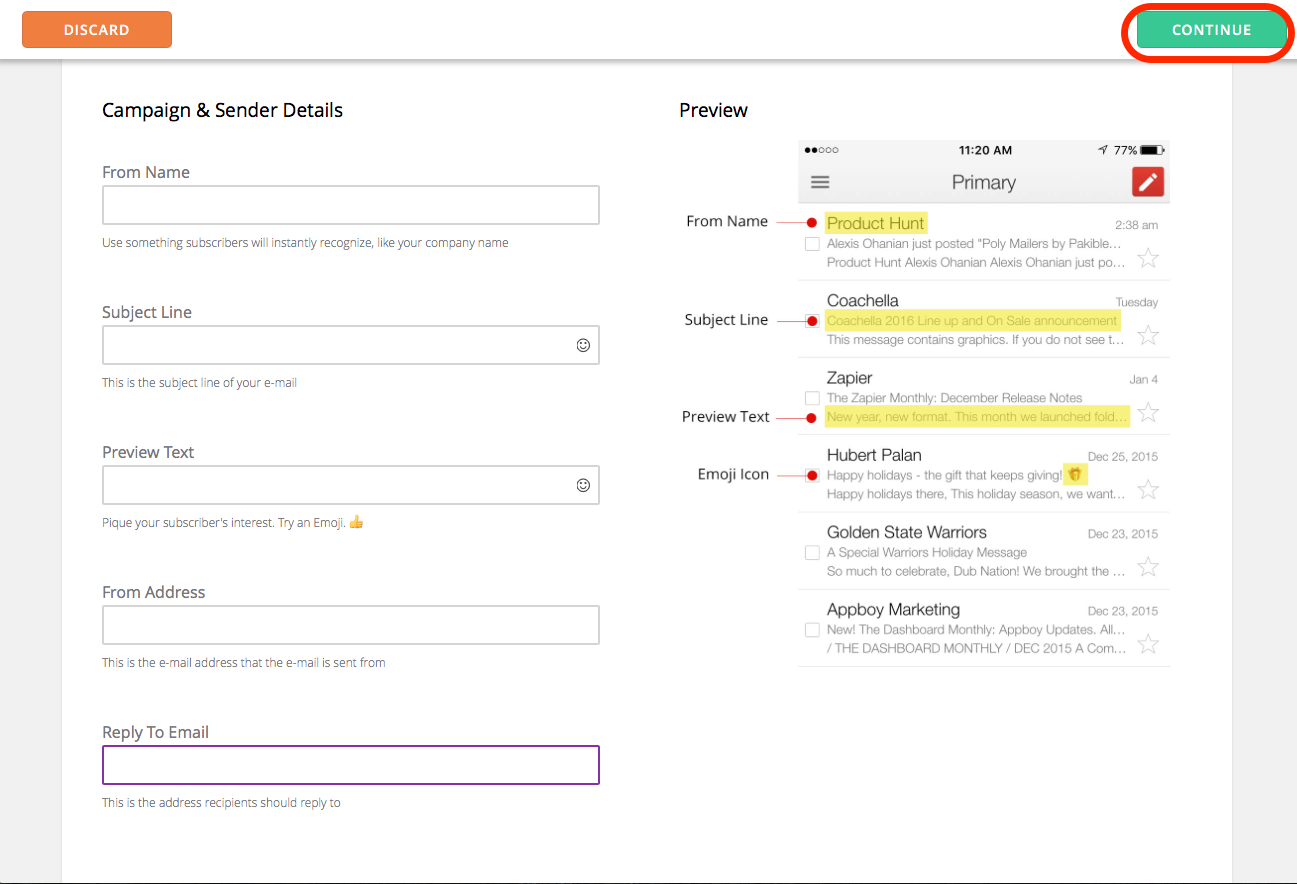
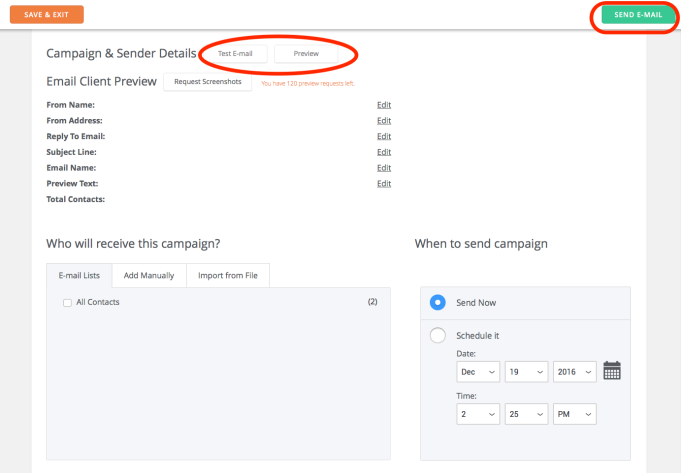
Step one: Fill out your campaign information on the Campaign & Sender Details page.
This is all of the information that your readers will see when they first get your email. Here’s a breakdown for each line:
From Name: This will usually be your company name. Most of your readers will recognize your company name before a person’s name.
Subject Line: This is what tells your readers what the email is about. It should be something interesting and attention-grabbing, so your readers want to open the email. It should also have something to do with the content in your email, which is a requirement of the CAN-SPAM law.
Preview Text: Many email clients show readers a line or two of text, under the subject line, before they click on the email. This is the Preview Text, and it can be a duplicate of your email’s first line of copy, or something different (but still related!) to pique their interest.
From Address: The address your readers will see when your email comes into their inbox. This doesn’t have to be the same as the reply-to email address, but your recipients will see it, so you may not want to use your personal email address here.
Reply To Email: The email address is where we’ll send any responses to your email. Your recipients won’t see this one, so be sure to use one that’s monitored in case they have any questions.
Fill in all of the details and click the green Continue button.
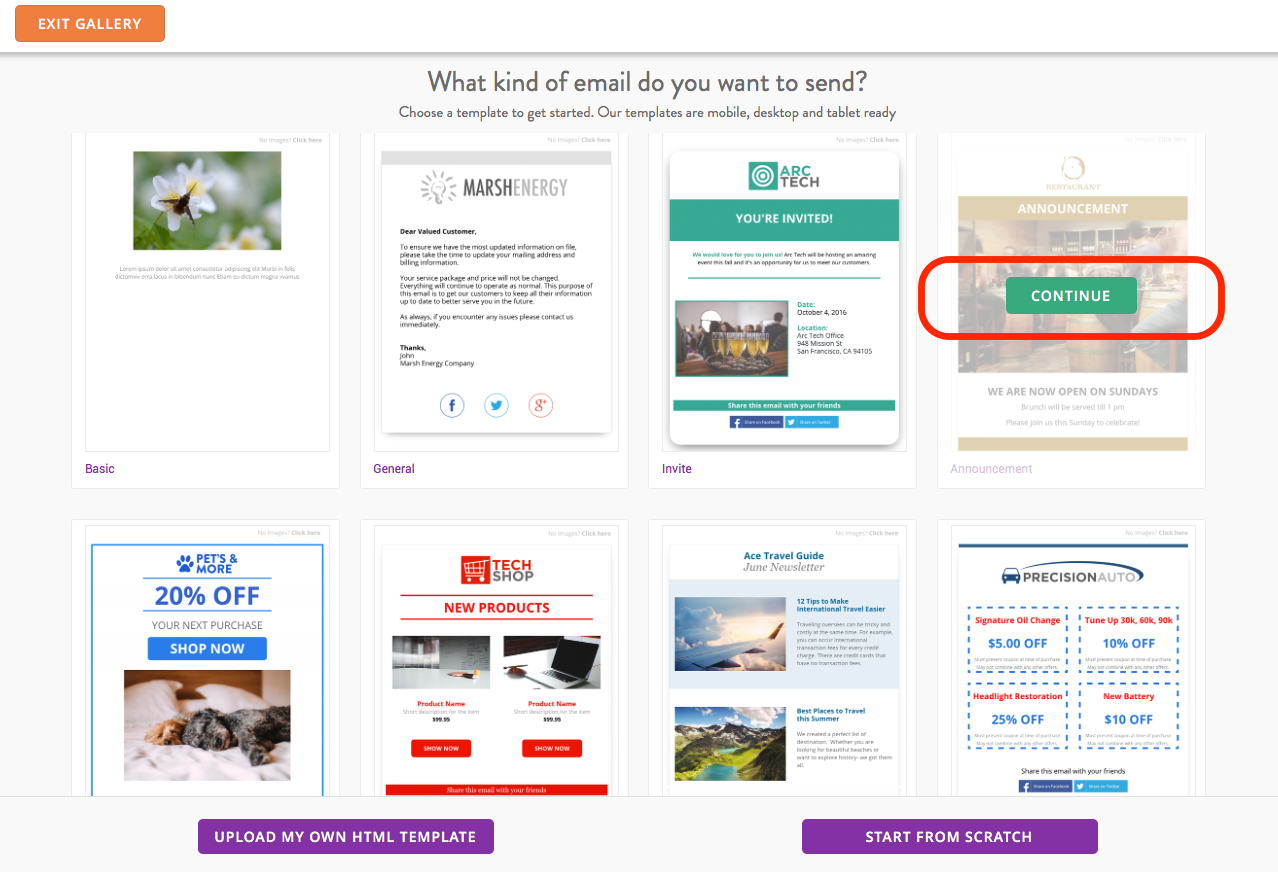
Step two: Visit our template gallery to choose which kind of email you want to send.
Choose from different kinds of emails such as announcements, newsletters, basic emails, coupons, and more. You also have the option to upload your own HTML template or start building an email from scratch.
Once you have chosen an email template, hover over it and click Continue.
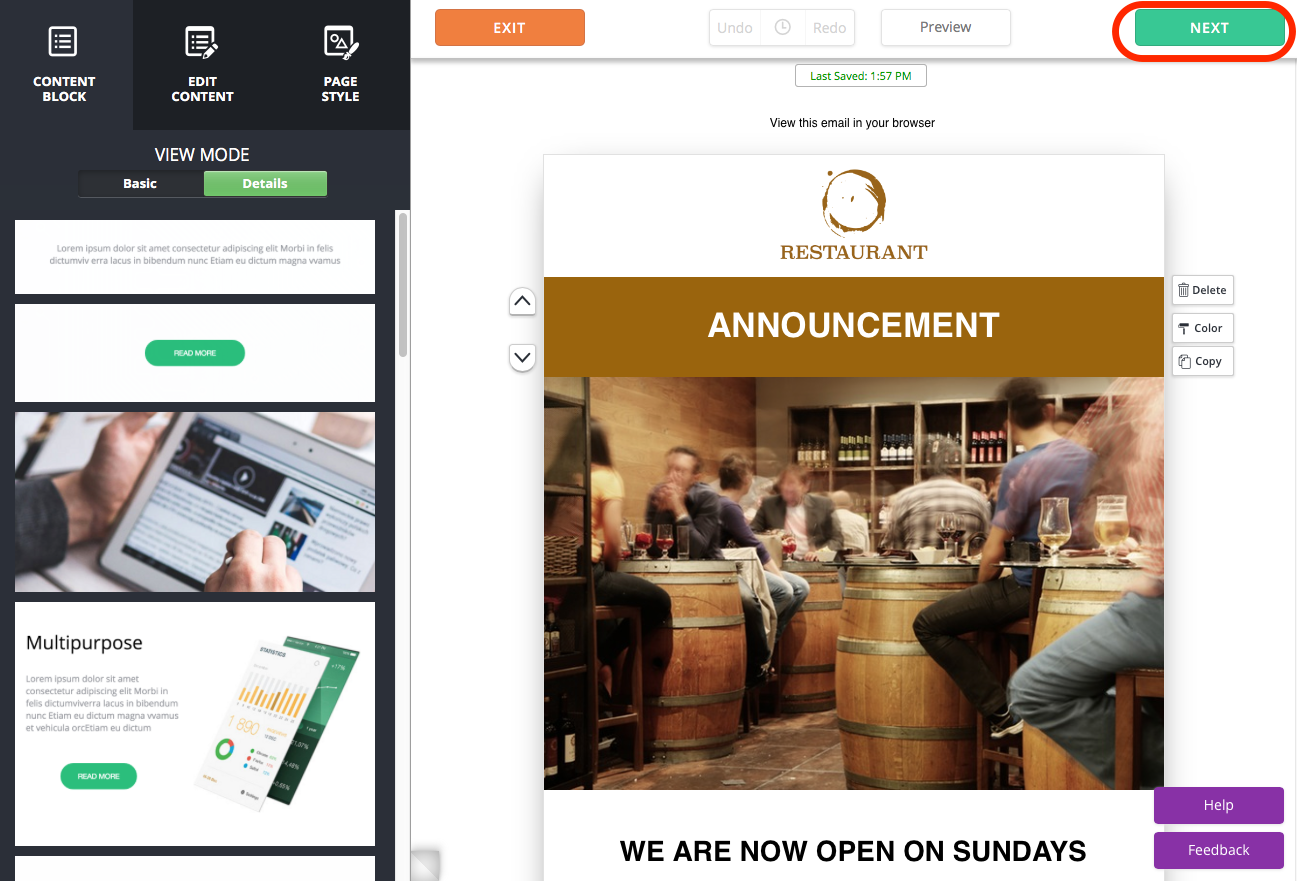
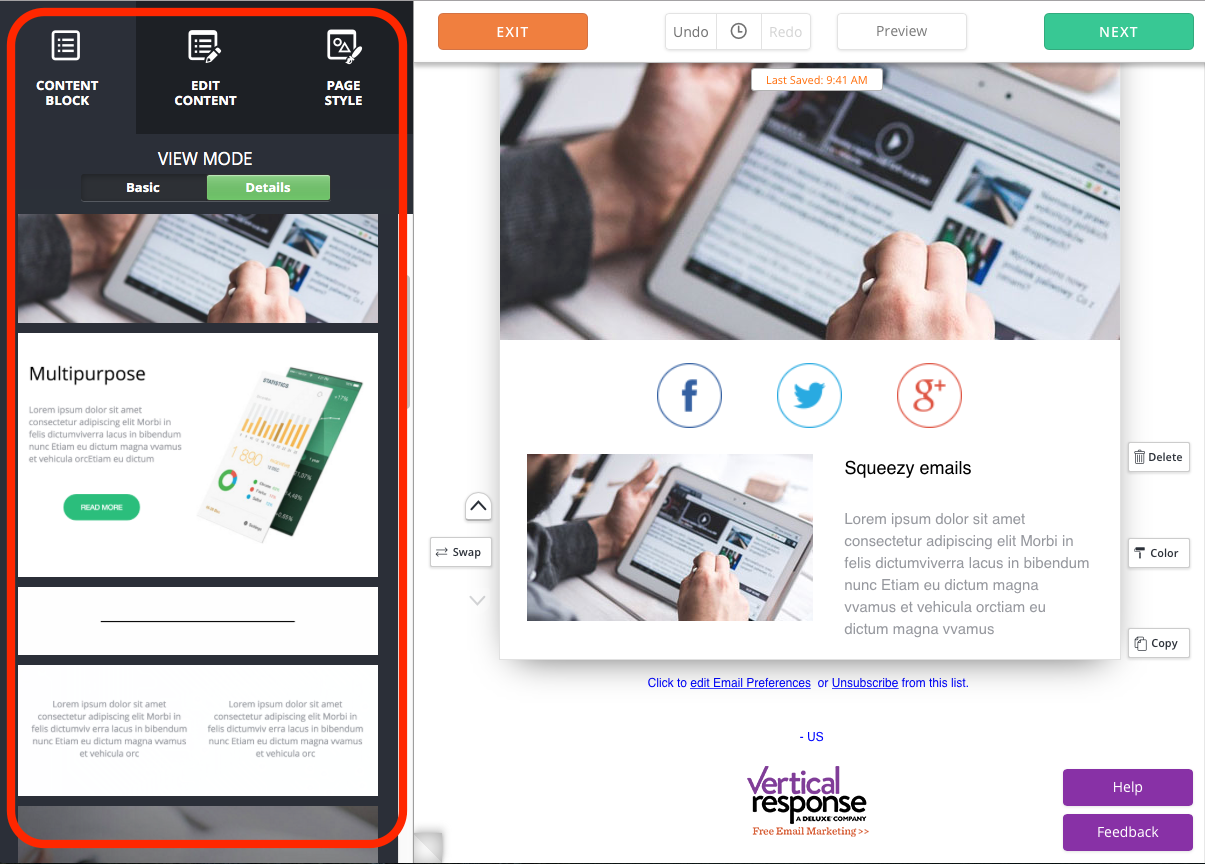
Step three: Add content.
Templates are pre-set with images and text blocks that make sense for your business. But you can easily make changes to fit your needs. The editor allows you to completely customize your email. Insert content blocks, edit images, change the background, and more! Let’s take a closer look at how to use content blocks in the section below.
When you’ve finished designing your email, click the Next button in the top right corner.
Step four: Preview, test, and send your campaign.
Here you can preview your email to see how it will appear when it’s read on a mobile phone, tablet, or desktop. You can also send a test email to ensure that your it displays correctly across email clients and web browsers. Your email layout make may look great in Gmail but not Outlook, so it’s best to send the email to yourself before sending it out to your subscribers.
When you’re ready to send, click the green Send Email button in the top right corner.
And there you go! In just a few quick and easy steps, you now have an email to send.
Content blocks
In the old email editor, to add content elements like text or photos, you had to drag your selection from the content menu and drop it into the template. While it was certainly possible to get the job done that way, there was very little flexibility in changing the layout. We knew we could do better!
To give you more control over the design process, the new editor uses a content block approach. Now you can easily and quickly add rows of new content elements, move them up and down, and swap them from left to right. You can also set the padding or amount of white space between elements — giving your content the room it needs.
Adding and editing content blocks
Content blocks are all of the individual content elements that make up your email’s layout — they are literally the building blocks of an email. As you explore the new editor, you’ll see that there are many different types of content blocks to choose from, including text, images, images and text combined, columns, buttons, dividers, and social icons.
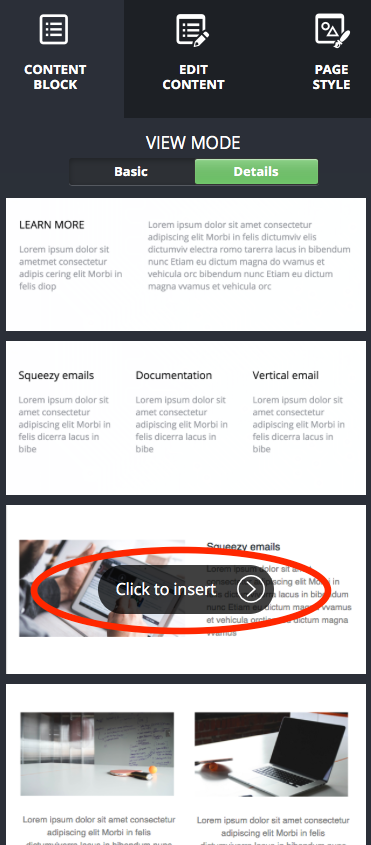
To add a new content block, select the Content Block tab from the left sidebar, then click on a content block to insert it into your template.
Once you’ve added the new element into your template, customizing it is just as easy.
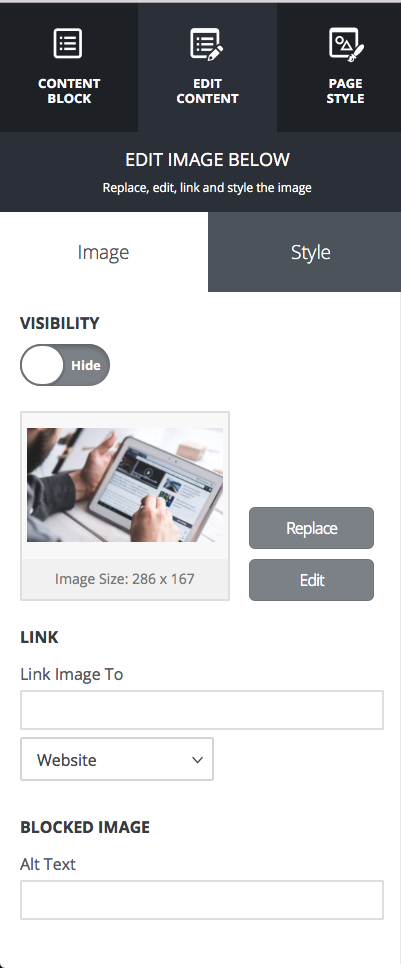
Hover over the element that you want to change, and click it to edit.
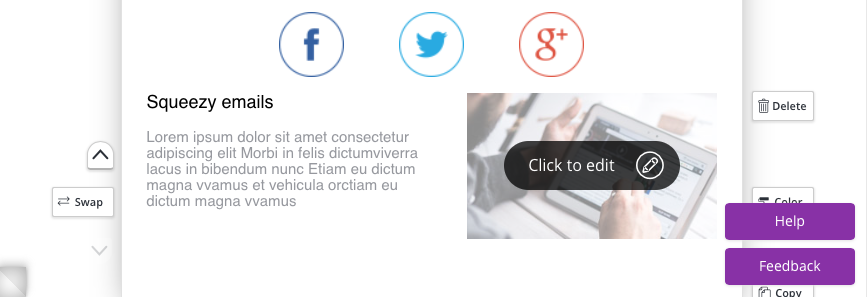
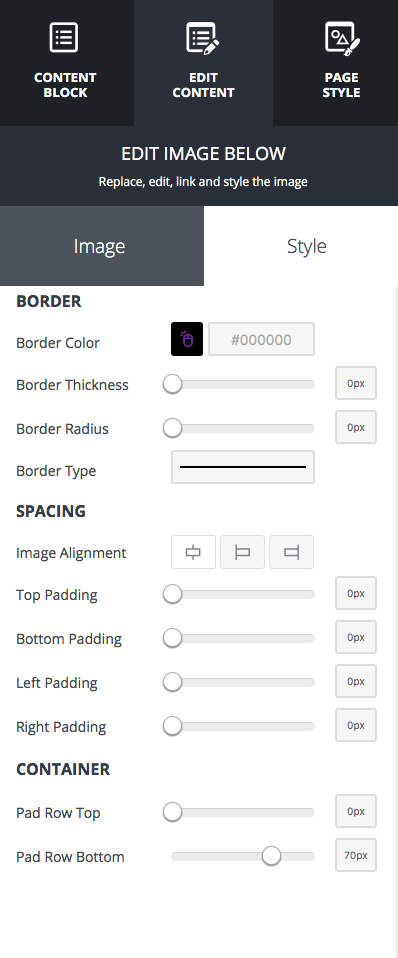
Using the left sidebar, you have the option of replacing or editing photos, turning images into links, and changing the size of the block’s border, spacing, and container.
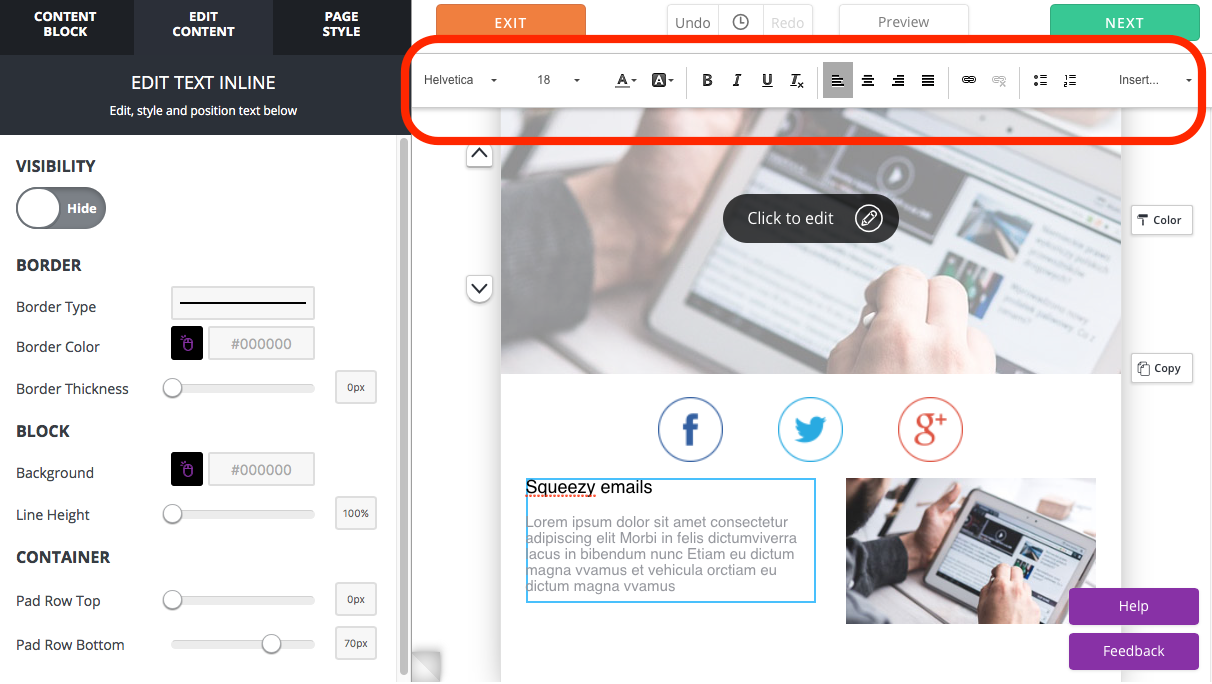
When entering copy into a text content block, our system will automatically check the spelling for you. Be sure you have Spell Check turned on, and you’ll see any errors with a red underline. You can also make adjustments to the text style (typeface, size, and so on) using the toolbar at the top of the page.
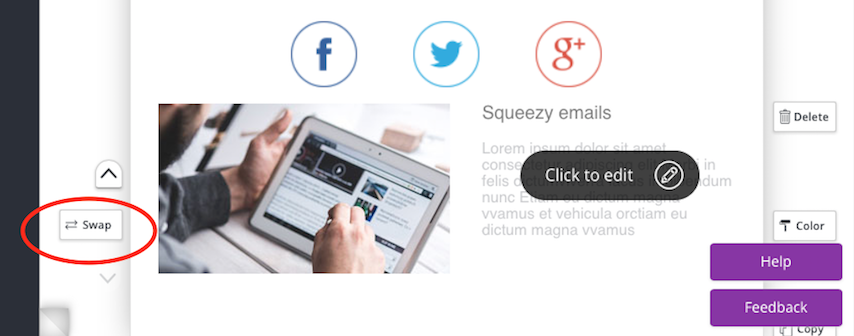
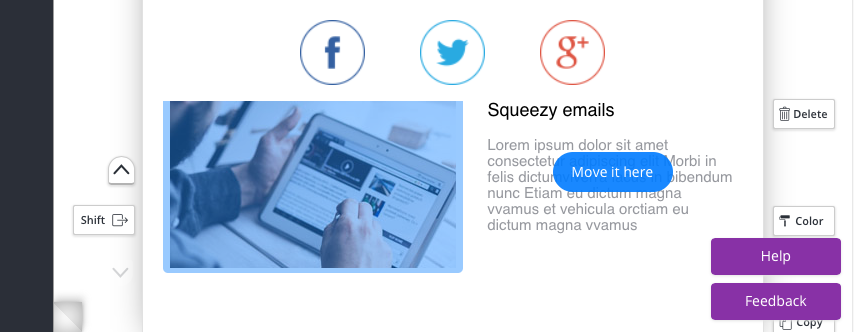
For content blocks with two or more columns, you can switch the placement of the elements by selecting Swap to the left of the content block, and then clicking Move it here. You can do this to put the image on the left and text on the right or vice versa.
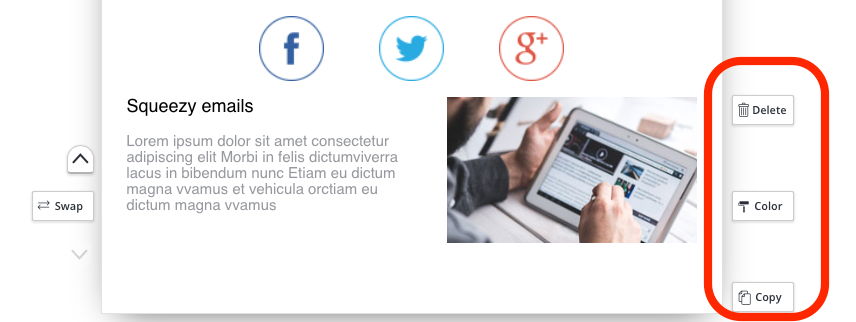
To delete the content block, change the background color, or create a copy of it, use the buttons to the left of the row.
All the changes made to your email are saved automatically, so no need to worry about losing your work! Did you add something but then decide that you don’t like it after all? Simply use the undo button. You’ll even be able to use the clock icon to undo previous edits.
![]()
Our new editor makes creating and sending professional email campaigns faster and easier than ever before. Find out more about the editor update here.
Build, send and track emails that look great on any device
© 2017 – 2018, Amber Humphrey. All rights reserved.


 Features
 Pricing
 Partner
 Blog
Blog Support
 More
More Terms of Services
 Privacy Policy